Requirements:
- You will need to know the password for an account on your computer with administrative privileges.
- Make sure you are on campus and connected to the internet.
- Windows 10 is required.
- You will need a Department ID (provided by the HIP business office or your program). Native American Studies requires both a department ID and PIN
Next:
Standard Installation for Windows 8 and Windows 10
Download the driver for your computer from the drivers here.

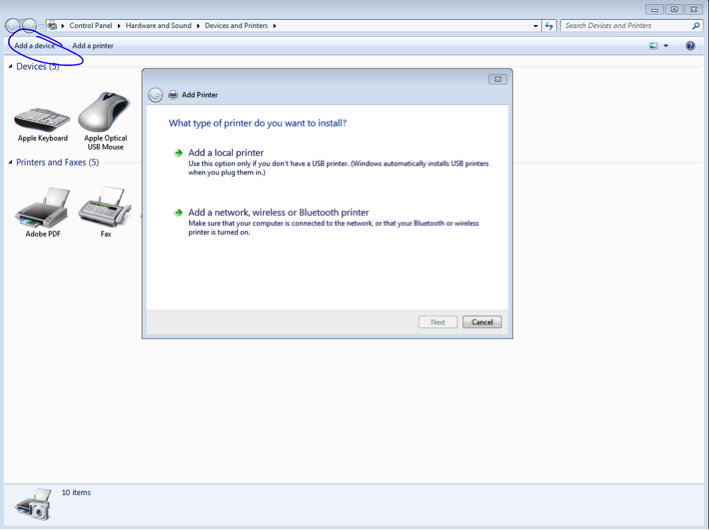
After the driver finishes downloading, click on the Windows logo on the bottom left of your screen and type "Control Panel". Then click Devices and Printers. Select Add Printer.


Select Add a network, wireless or Bluetooth printer to open a new window, then select The printer that I want isn't listed on the bottom for another window.
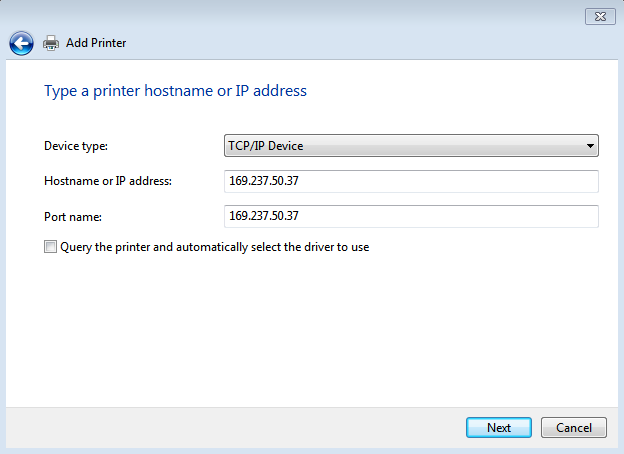
Select Add a printer using a TCP/IP address and then click next.
For Device Type select TCP/IP Device from the drop down list. In Hostname or IP Address input the printer's IP address as listed below. The box for Query should not be selected. 
Click Next. In the next window, select Have Disk.

Click on the lower right bottom named Have Disk in the window
Select Browse to then search for your recently downloaded driver, select the folder for the driver, then select Driver, and then select the actual driver as shown:

The driver will be the only file selectable in the folder
Click OK.
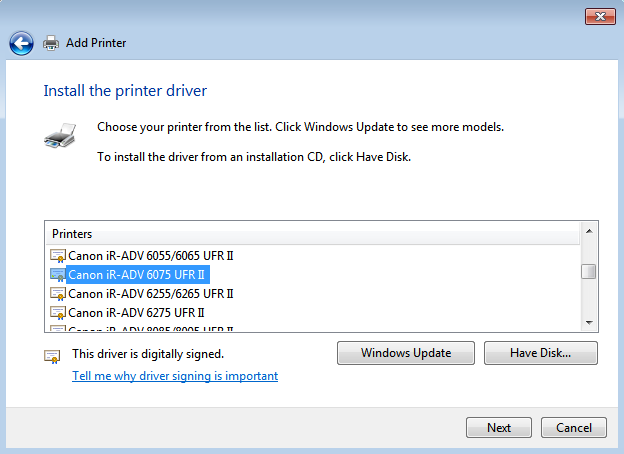
Scroll down the list of printers to then select Canon iR-ADV 4025 UFR II, for example.


Click Next, then follow the on-screen instructions to name printer and continue until printer finishes installing.
For Printer Sharing, select Do not share this printer. Click Next.
Deselect the Set the default printer and click Finish.
Return to Devices and Printers window and select your recently added printer. Right click on the printer image and select Printer Properties.
In the new window, select Device Settings.
Make sure both Department ID and User Information are selected. Select Settings next to Department ID. In the window, input your 4 digit copy code in the Department ID field, you may also have a PIN depending on your department in which case select Allow PIN Setting, then deselect Confirm Department ID/PIN when Printing. Click OK.


Returning to Device Settings, click Apply on the bottom and then OK.
Open Microsoft Word, or another word processor to print a test page to make sure it prints successfully.